Last Tuesday, I walked into the Rosenberg’s home in Lakewood to find Mrs. Rosenberg practically in tears over her kitchen.
“I’ve scrubbed for hours, and it still looks grimy,” she told me, pointing to cloudy granite countertops and cabinets with a stubborn film that wouldn’t budge.
Three hours later, she kept touching her countertops in disbelief. “It looks better than when we first moved in!”
After years running my cleaning service across Ocean County, I’ve learned that the difference between endless scrubbing and effortless results isn’t elbow grease—it’s understanding the science of cleaning.
Professional cleaners aren’t working harder; we’re working smarter by applying basic chemistry principles most people never learned.
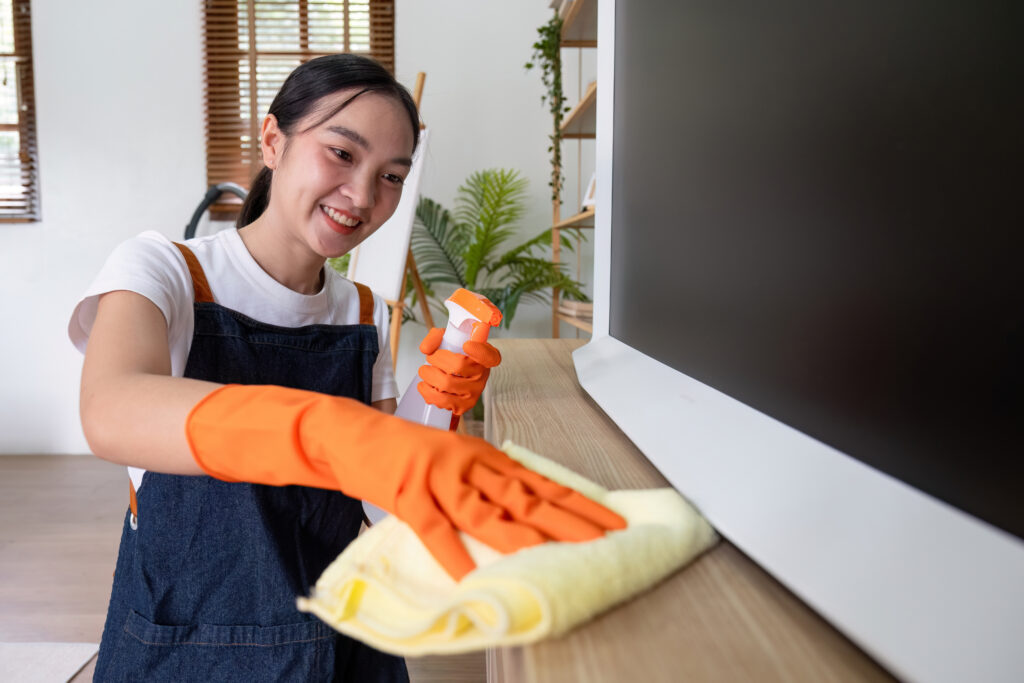
The Secrets Of a Clean House
The pH Secret That Changes Everything
Remember high school chemistry? That pH scale from 0 to 14 is the key to cleaning efficiently.
When I first arrived at the Rosenberg’s, I immediately recognized the problem: she’d been using an alkaline all-purpose cleaner (pH around 11) on her acidic granite countertops. Instead of cutting through grease, the cleaner was reacting with the stone and creating that cloudy film that wouldn’t wipe away.
Here’s what professionals know about pH that transforms cleaning:
Acidic Cleaners (pH 0-6) dissolve mineral deposits and soap scum. That’s why vinegar (pH 2.5) works wonders on shower doors and coffee makers—it dissolves the calcium and lime that water leaves behind.
Alkaline Cleaners (pH 8-14) break down organic matter and grease. That’s why oven cleaners and degreasers are highly alkaline—they’re specifically formulated to dissolve the carbon bonds in burned-on food and oil.
The Rosenberg’s cloudy countertop? I neutralized the alkaline residue with a slightly acidic cleaner, and the film wiped away almost instantly. Science, not scrubbing.
Contact Time: The Variable Most People Miss
Last month, my new client Mrs. Patel couldn’t understand why her bathroom always smelled funky despite regular disinfecting. Watching her clean revealed the problem immediately: she was spraying disinfectant and wiping it away within seconds.
Here’s what the product label clearly stated but she’d never noticed: “To disinfect, let product sit on surface for 10 minutes before wiping.”
Contact time is critical because disinfectants need time to break down bacterial cell walls. Wiping too quickly is like taking an antibiotic for just one day—you’ve essentially done nothing.
Professional trick: Work in zones and clean systematically. Spray your shower, then clean the sink while the shower disinfects. Move to the toilet while the sink disinfects. By the time you’ve finished the toilet, the shower has had proper contact time.
The Surface-Specific Approach
The Jacobs family couldn’t figure out why their expensive stainless-steel refrigerator always looked streaky despite using “stainless steel cleaner.” When I checked the product, it contained silicone—perfect for most stainless steel but incompatible with their fingerprint-resistant coating.
Professionals categorize surfaces not just by material but by:
Porosity: How much liquid can the surface absorb? High-porosity surfaces like grout need different cleaning approaches than non-porous surfaces like glass.
Finish: Matte, glossy, textured, and satin finishes all require different techniques. What works on glossy ceramic tile will leave streaks on a matte finish.
Coating: Many modern surfaces have specialized coatings that change how they should be cleaned. Those “fingerprint-resistant” appliances? They have a clear polymer coating that standard stainless cleaners can damage.
For the Jacobs’ refrigerator, the solution was simple: just warm water and microfiber, followed by a gentle buff. Their expensive cleaners were actually causing the problem.
The Microfiber Revolution
Speaking of microfiber—it’s not just marketing hype. When the Goldsteins asked why their windows still had streaks after cleaning with paper towels and newspaper (an old trick), I showed them the science:
Standard cotton cloths and paper products have fibers around 10-50 micrometers wide. Microfiber cloths contain synthetic fibers smaller than 1 micrometer—thinner than a human hair. This matters because:
- Those tiny fibers can get into microscopic surface crevices
- The synthetic material creates a slight electrostatic charge that actually attracts dust and dirt particles
- The fiber structure creates capillary action that absorbs liquids much more effectively
I cleaned one half of their sliding glass door with newspaper and glass cleaner, the other with just water and a quality microfiber cloth. The microfiber side was noticeably clearer—and I used no chemicals at all.
Professional secret: Not all microfiber is created equal. Those $5 packs of “microfiber” cloths at the discount store aren’t the same as professional-grade. Look for cloths with at least 200,000 fibers per square inch (sometimes listed as “70/30 blend,” referring to the polyester/polyamide ratio).
Temperature: The Catalyst Most Cleaning Products Need
When Mrs. Abrams couldn’t remove the sticky residue left by labels on her new glass bakeware, she’d tried every solvent in her cabinet without success. My solution wasn’t a fancy product—it was applying heat.
Most chemical reactions double in speed with every 10°C (18°F) increase in temperature. That’s why:
- Hot water dissolves grease much better than cold
- Steam cleaning is so effective on tough grime
- Warming a surface before applying cleaner dramatically improves results
For Mrs. Abrams’ sticky residue, I soaked a cloth in hot water, held it against the label for 30 seconds to warm the adhesive, then used a basic citrus cleaner that had failed her before. The residue wiped away instantly.
Professional tip: For stubborn kitchen grease, warm the surface first with hot water, then apply your cleaner. You’ll use half as much product with twice the results.
The Cleaning Sequence That Changes Everything
The Davidson family spent every Saturday deep-cleaning their home, yet somehow it never seemed truly clean. Watching their routine revealed why: they were cleaning in the wrong order.
Professional cleaners follow a specific sequence based on two principles:
Top-to-Bottom: Gravity is always working. Clean ceiling fans before countertops, and countertops before floors, or you’ll just be redistributing dirt.
Dry-to-Wet: Always remove dry soil (dusting, vacuuming) before introducing moisture, which can turn dust into mud.
The sequence I taught the Davidsons cut their cleaning time by nearly half:
- Remove clutter (this step alone makes everything else more efficient)
- Dust from top to bottom (ceiling fans, shelves, furniture)
- Vacuum all floors and upholstery
- Clean glass and mirrors (which creates minimal drips)
- Clean other hard surfaces
- Disinfect high-touch areas
- Finish with floors
Six months later, Mrs. Davidson told me the sequence alone has transformed their home’s cleanliness—and given them back their Saturdays.
The Tools Professionals Won’t Clean Without
In the Mikhail’s home, I noticed their cleaning caddy contained fifteen different products but lacked the three tools I consider essential:
A Quality Vacuum with HEPA Filtration: Vacuuming with a poor-quality machine often makes air quality worse by stirring up particles too small to capture. I demonstrated this by vacuuming their living room with my professional vacuum, then immediately going over the same area with a black microfiber cloth. The cloth came up noticeably dirty—particles their vacuum had stirred up but failed to capture.
Microfiber Cloth System: Professionals use color-coded microfiber to prevent cross-contamination. In my service, blue is for general surfaces, yellow for bathrooms, green for kitchens, and red for toilets only. Each cloth is used for a specific zone, then properly laundered.
Extendable Duster: Ceiling fans, high shelving, and light fixtures harbor significant dust that regularly falls onto your freshly cleaned surfaces. A good extendable duster with a washable head lets you capture this dust rather than just relocating it.
Maintaining the Spotless Home
The biggest difference between perpetually clean homes and those that never seem to stay clean isn’t daily effort—it’s strategic maintenance.
The Levinson family transformed their always-cluttered home with these professional maintenance secrets:
- The 10-Minute Reset: Each evening, the family does a 10-minute “reset” where everyone returns items to their proper places. This prevents the accumulation that makes deep cleaning so difficult.
- Touch-Once Rule: If you pick something up, put it away immediately rather than setting it down elsewhere temporarily. This single habit eliminated their countertop clutter.
- Strategic Frequency: Some tasks need daily attention, others weekly, monthly, or seasonally. The Levinsons posted a simple cleaning calendar that prevented both over-cleaning and under-cleaning.
After implementing these systems, Mrs. Levinson told me, “For the first time, I feel like our home is working for us, not against us.”
Whether you’re struggling with specific cleaning challenges or just want to make your efforts more efficient, understanding these professional principles can transform your approach. It’s not about cleaning harder—it’s about cleaning smarter, with science on your side.